Showing posts with label Sciency answers. Show all posts

30 November 2011

Sciency Answers: How multicolor corn works

During Thanksgiving, people must have spent some time looking at decorations involving multicolored ears of corn, because I got several questions all essentially asking, What is up with that? How does a single ear can have many different colors on it, while you never see, for example, a single plant producing yellow, red and purple tomatoes? How does corn pull it off?
Corn does it the same way my parents had five kids, ranging from brown-eyed, brown haired me to my blond blue-eyed brother, with a smattering of hazel eyes and light brown/dark blond siblings in between. In other words, when you look at an ear of corn, you are looking at the next generation, and the genetics of each individual seed determines what color it is. With a tomato or any other fruit, what you see is produced by the mother plant, so it looks the same no matter the genetics of the seeds inside, just as my mother's pregnant belly looked the same whether that particular baby was a blond or brunette. But since each kernal of corn is a seed, you get a preview of the next generation.

As a gardener, and enthusiastic backyard plant breeder, I think this is one of the most fun things about corn. You get a little preview of the next generation before you plant the seed. Buy a mixed packet of petunia seeds and they'll all look the same, you have to plant them to find out what color they are. But when I buy different mixes of colored corn, I get to spend a very happy time sorting through them, picking out the colors I like best, so that when I plant them I get a customized mix of colors I like best.

Have a question? Get a sciency answer! Just e-mail me: engeizuki at gmail dot com

01 November 2011

Sciency Answers: The great fertilizer debate

Gary has a question:

Are organic fertilizers such as GardenTone and HollyTone really worthwhile using or is putting compost on your garden beds just as good?

Feeding soil versus feeding plants
Compost provides two things when you put it in your garden. A small amount of fertilizer for plants to take up, and a huge amount of food for all the earthworms, bacteria, fungi, and such in the soil. The fertilizer component is released slowly over time as the compost is degraded by soil life and taken up by plants to use to build leaves and flowers. The soil eating the rest of it improves the texture and structure of the soil making it better at holding water, nutrients, and allowing plant roots to grow through it more easily, so the same amount of fertility is utilized much more effectively.

Fertilizers, on the other hand, just provide nutrients for the plants. Because they are not tied up in the complex structures of compost, they are released quickly in higher concentrations to the plant roots. There really isn't much of a difference between organic and synthetic fertilizers here. The compounds the plant roots actually take up are absolutely identical in either case, and, depended how they are formulated, both synthetic and organic fertilizers will be released fairly quickly in high concentrations. Since both lack the bulky organic matter of compost or mulch, neither are going to do anything to improve soil structure and health in the long term.

More isn't always better
Fertilizers need to be used with caution. I grew up in a rural area where most people's "lawns" were really periodically mowed meadows, never fertilized or watered, and full of as many flowers (what the lawn care companies call "weeds") as actual grass. But we got a new neighbor who had lived in the city, who wanted a green, all grass lawn. They bought a bunch of fertilizer, and dumped it on. Their grass turned a vivid shade of green almost over night. And after the next rain storm, so did the drainage ditch all down the street and a good portion of our stream with a mass of algae spurred into growth by the fertilizer bonanza. Because fertilizers are quite concentrated and release their nutrients quickly, it is easy to over do it. You can harm you plants, but long before you do, you'll harm the more delicate life in the soil, and pollute your local ground water and wetlands as all the extra fertilizer leaches out of your soil.

The bottom line
In my own garden, I rely almost exclusively on compost and mulch to provide fertility. I do use more concentrated fertilizers, but only rarely in my container plantings, and very rarely in new beds that haven't yet been beefed up with enough compost for hungry plants like vegetables. In my ornamental beds, I don't even use compost, just regular mulching, because keeping fertility relatively low there keeps my plants a bit smaller and more compact so I don't have to stake them. When I do buy fertilizer, I frankly don't see much difference between synthetic and organic, so I go with price and convenience, which leads me to a slow-release synthetic fertilizer.

Have a question? Get a sciency answer! E-mail me: engeizuki at gmail dot com

28 September 2011

Sciency Answers: Pruning dormant roses

Esther over at Gaias-Gift has a question:

A number of us are discussing a common wisdom thing about not pruning your roses before the forsythia bloom or only when the buds start swelling. The implication that I will harm my roses by pruning before they start to come out of dormancy doesn't exactly make sense to me. ...the implication of what people say is that pruning in late winter, before they come out of dormancy on their own, brings them out of dormancy too early, making them more vulnerable to freezes than they would otherwise be. Is there any science to support that?


I love getting questions like this! I've heard this since I began gardening, and never stopped to wonder if it is true, and if so, WHY?

Pruning can break dormancy
So I've been poking around, and it turns out that yes, pruning woody plants can cause them to break dormancy earlier. Most of the research on the topic is in grapes, but from a very different perspective than those of us in cold climates worried about late freezes. Rather, I found a lot of research on growing grapes in warm, semi-tropical climates where there isn't enough cold to break dormancy naturally. In Taiwan, is appears, grape growers can keep their vines growing without a winter by using a combination of severe pruning and plant hormone treatments. But it isn't just in grapes. I found studies of cherries, peaches, and apples with similar findings. So many woody plants are stimulated by pruning, even when they are dormant.

More susceptible to freezing?
Interestingly, though, the one paper I could find that actually measured the winter hardiness of developing buds at several time points after pruning didn't find any change, so there isn't direct evidence that early pruning will lead to more damage from late freezes. That isn't to say it doesn't happen, however. Cold hardiness is notoriously hard to study because there are so many factors from moisture to time to temperature that make it very hard to recreate the real world effects of cold in the lab, so just because one group of researchers weren't able to find a difference doesn't mean there isn't one.

Why?
But what gives? I mean a dormant rose bush is just sitting there. How and why does it respond to someone cutting bits of it off? Well, I found some papers looking at dormancy in grapes, and they found that dormant buds are really quite busy, with many genes still being actively expressed. The also found that during natural dormancy breaking, the hormone auxin peaks in the buds a full two weeks before any visible bud swell. So, in late winter, when your plants look like they are just sitting there, they aren't. Genes are doing there thing, and hormones are churning, and when you take your pruners and lop something off, you change the patterns of gene expression, the flow of hormones, and can stimulate buds to break dormancy and start growing.

The bottom line: wait to prune
It looks like the advice to avoid pruning too early in the season is good. By pruning too early you can cause them to begin growing to early, and result in more damage from late spring freezes.

24 July 2011

Sciency Answers: Variegation part 2. Stripes and splotches!


Last week I talked about the colored patterns on leaves created for some evolutionary adaptive reason. This week I'll be talking about the freaks of the plant world, the strange variegated mutants that we humans love and keep around to add color and excitement to our gardens.

Chimeras
Imagine, for a moment, that you had to get a kidney transplant. Your kidneys are failing, so a good friend donates you her kidney. It is a medical miracle, you owe your friend everything, and you are now a chimera.

The word Chimera comes originally from Greek mythology, and refers to a monster killed by Bellerophon, (who, poor fellow, no one remembers anymore, though everyone knows his cool winged horse Pegasus) which had the head of a lion, body of a goat and tail of a snake. Since the original chimera is one animal made up pieces of lots of different animals, scientists now use the term to mean any single organism with genetically different sections of cells. Like a person with a kidney transplant. All of your body has your DNA, except the the cells in the donated kidney, which have the DNA of the friend who saved your life. You wouldn't, however, pass on your donor's DNA to your children. Kidney cells only make other kidney cells, not eggs or sperm. Unlike, say, if you had an ovary transplant in which case the children you bore would be genetically the children of the ovary donor, not you.
We can become chimeras naturally as well. Imagine a developing embryo. It starts off as one single cell, which keeps dividing, and bit by bit different cells get designated to develop into your brain and skin and kidneys. If some mutation just so happened to happen in that cell that was going to become your kidney, that mutation would be in that kidney for the rest of your life, but not in the rest of your body. (For more on human chimeras, including an incredible story about a women who was not the genetic mother of her own son, check out this amazing (as always) episode of Radio Lab. Her story starts at about the 6 minute mark).

Plants, of course, are arrange a little differently, with new growth and organs coming from buds. But within the group of actively dividing cells in a plants' bud, the meristem, there are three (sometimes 2) layers of cells, called (very uncreatively) L1, L2, and L3. L1 is very outer layer of the plant, L3 the center, and L2 in between. Just as new kidney cells only come from other kidney cells in our body, new L1 cells come from other L1 cells. So, if there is a chance mutation interrupting normal chlorophyll production results in mutant white (or yellow) cells in, say, the L1 layer, you can get a plant which is a chimera – mutant albino L1 layer, but regular green for the other two.
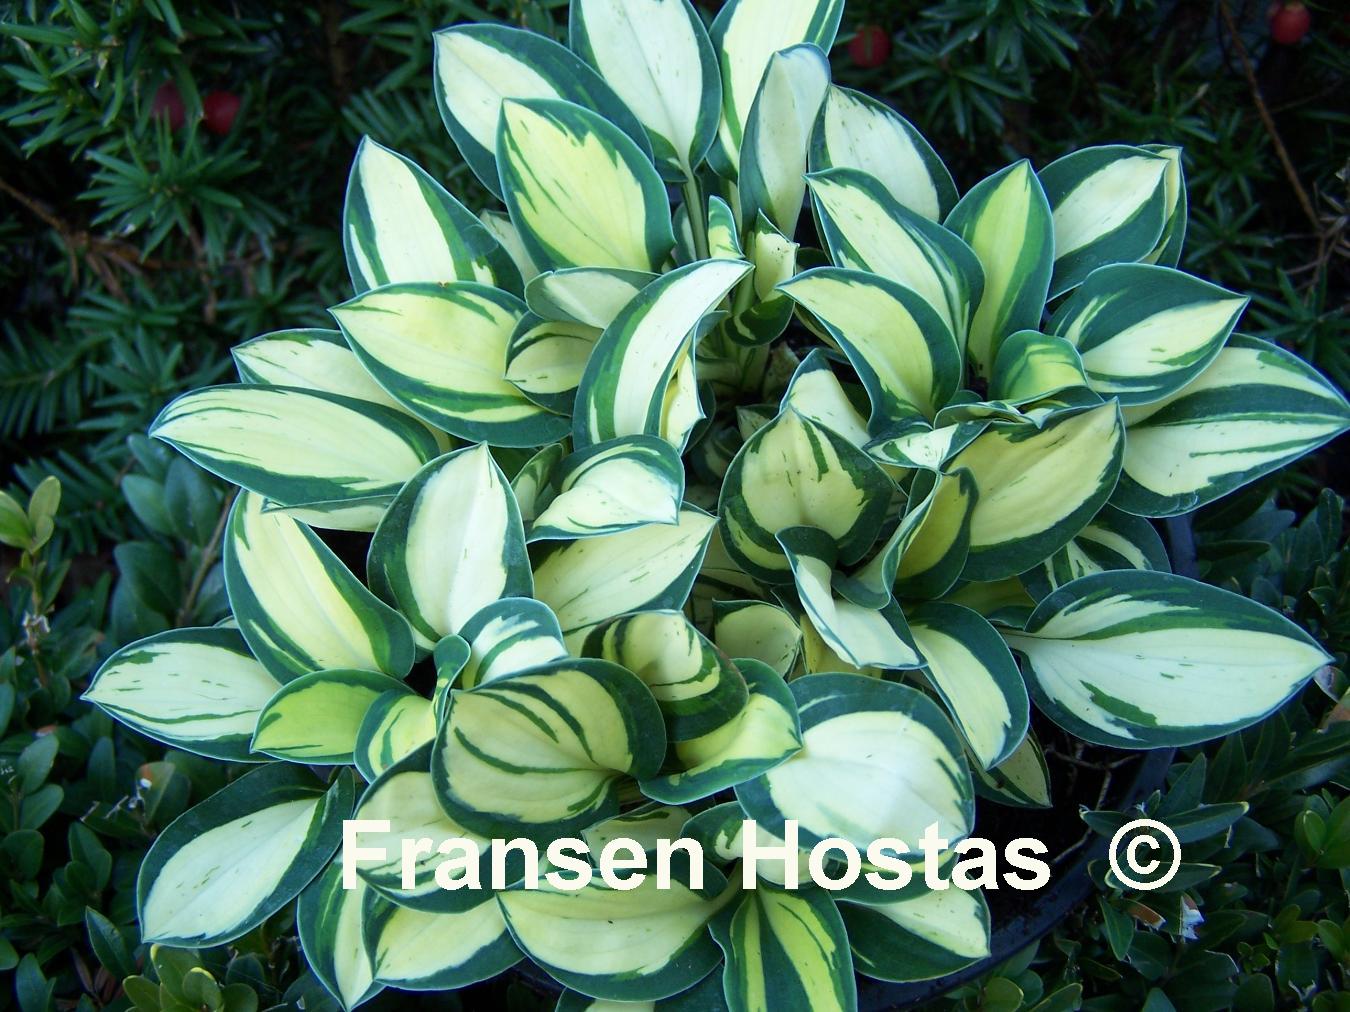
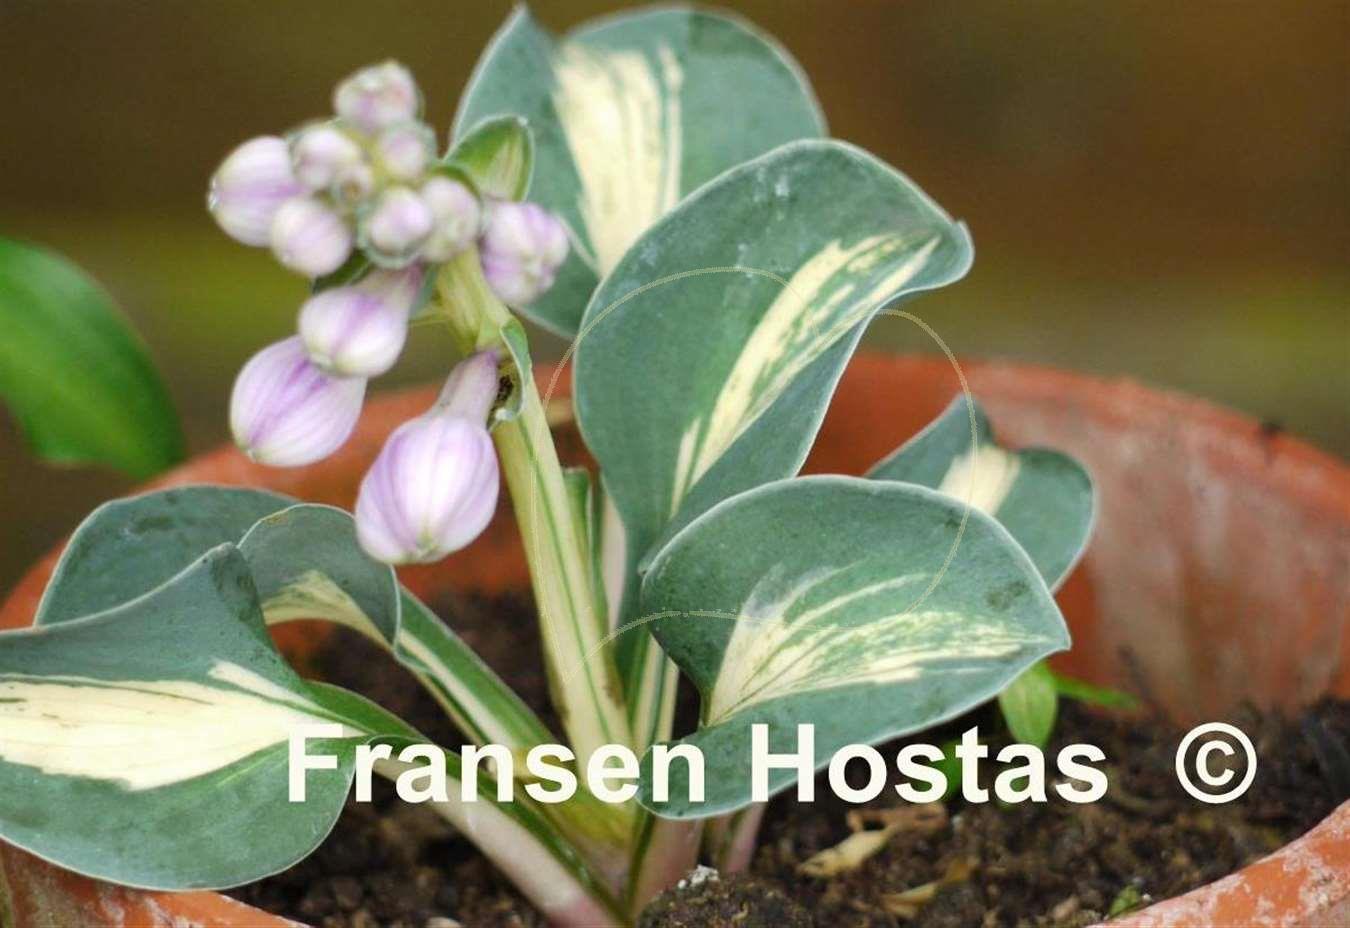
You've seen this is hostas. Here's the cute miniature hosta, 'Blue Mouse Ears'

And here are some chimeral versions of the exact same plant. The only difference between these different varieties is which layer or layers are albino mutants:
So chimeras can create all kinds of lovely variegated plants. Seedlings from these plants won't be variegated, just as the children of a person with a kidney transplant won't have genetically different kidneys. Plant gametes (sex cells) are made by just one of the layers, so depending on which layer is variegated, the seedlings will either be all green (boring) or all white (dead).
So where do new variegated hostas come from? Well, in some cases, people just have to be patient and wait for a variegated mutant (aka sports) to pop up. But there is also a special trick that results in variegated plants that can pass on their variegation to the next generation.
Chloroplast mutants
Here is a cell.
Chloroplasts are where photosynthesis actually happens, what makes a plant green. They also, strangely enough, have a little of their own DNA. They actually  essentially little cells within a cell, doing their own dividing, reproducing, and of course, mutating. Sometimes those mutations cause them to stop making chlorophyll, and become white.
As long as a cell has mostly green chloroplasts, all is well. The white ones just hang out, dividing occasionally, doing their thing. But when a cell divides into two new cells, the chloroplasts get split up between the daughter cells. And if the parent cell has some white and some green chloroplasts, just by chance, sometimes it will make cells with all green chloroplasts, sometimes all white chloroplasts, and sometimes a mix of the two types.
 When this happens in a plant, it looks like what you see here in yet another variegated sport of the (apparently very mutation prone) hosta 'Blue Mouse Ears'
The white patches have all albino chloroplasts, while the green ones are either all green, or a mix of the two.
This type of variegation will often come true from seed, because as long as the individual cells that develop into the embryo in the seeds contain both green and white chloroplasts, the new seedling will show just the same streaky, blotchy variegated pattern.
Sometimes, though, just by chance, the cells with white chloroplasts end up isolated in one of the layers, and the green cells end up in the other layers – the irregular chloroplast mutant variegation becomes a tidy chimeral variegation. Nursery people refer to this as the variegation stabilizing. Hosta breeders make use of this all the time, using plants with unstable streaky variegation in their breeding programs to create seedlings which can stabilize into varieties with neat variegation on leaf margins or centers which they can then sell to you.
Transposons
Another, completely different way variegation can come about is through the so called jumping genes, transposons.
Genes are essentially little templates for making proteins. Proteins in cells can be incredibly complex, and act like little machines doing. They build stuff, take stuff apart, modify chemicals into other chemicals, and generally run the show. But transposons are genes that do something rather odd. Instead of making a protein that goes off and does something, the protein they make simply comes back, makes a copy of the gene that made it and sticks that copy somewhere else in the genome. Transposons are genes that can make copies of themselves, the chain letters of the genetics world.
Transposons are everywhere. In fact, almost half of the DNA in your body is actually transposons. They keep copying and copying and copying, filling up the genome. All those transposons jumping around can cause problems. As they move about the genome, they sometimes land in the middle of other genes, causing them not to work right anymore. It is like you opened your cook book to make brownies and the recipe read: “1 cup COPY ME flour COPY ME COPY ME 2 COPY ME cu COPY ME ps sug COPY ME ar.”And sometimes, the transposon moves in and out of a gene at different times in different cells as a flower or leaf develops. And then you can get this:
This poor morning glory has a transposon problem. The transposon keeps bouncing into the middle of a gene it needs to make the purple pigment for the flower. When it does, the gene stops working, so those cells are white. When the transposon moves out of the gene again, it starts working, and you get purple. Many striped flowers, and some striped leaves, are the lovely result of a poor plant with transposons moving about.
So next time you pick up a beautifully variegated plant, or admire the pattern of a striped flower, take a moment to appreciate that is happening. Two genetically different cell types living peacefully together, white and green chloroplasts getting shunted this way and that, or perhaps unruly transposons bouncing in and out of genes.

(Correction: In my original post, I described the plant as actively removing transposons from genes, which a friend who knows a LOT more about transposons corrected. Plants have no way to actively kick a transposon out of a gene, though there are various mechanisms by which transposons are inactivated so they stop moving around the genome.)

Have a question? Get a sciency answer! Just e-mail me: engeizuki at gmail dot com

18 July 2011

Sciency Answers: Variegation Part 1


Henry has a question about variegation:

I would like to ask you a question about variegated Hippeastrum reticulatum. Usually variegated gene is recessive but why the variegated mid-rib of
hippeastrum reticulatum is dominant in all its F1 hybrids, and
successive breeding dilutes the character from white mid-rib to yellow
mid-rib?

Looking forward to your sciency answers !!!


Well! I'm going to have all sorts of fun with this. I hope you are all ready, because the world of variegated leaves is cool and crazy.

First, some pictures to illustrate what he's asking about. This is the beautiful foliage of Hippeastrum reticulatum with distinctive white stripes down the center of each leaf:
And here is an example of a more typical sort of variegation, as seen on a Clivia leaf:
The word variegation covers both these types of leaf patterns. In fact, the most basic defintion of the word courtesy of Miriam-Webster is “Having discreet markings of different colors.” That could be applied to bicolored flowers, spotted cows, or striped curtains. But when someone says a plant is variegated, they almost always mean that it has some kind of white or yellow (or rarely other colors like pink) pattern on the leaves. So though the dictionary would tell you you are correct if you called the blotch in the center of a pansy flower variegated, say that to another gardener, and they'll be looking for white on the leaves.

But even narrowing down the term to white (or yellow or maybe pink) patches on leaves there are still a lot of different sorts of things being called variegation. 

Most variegations in your garden are what I'd call non-adaptive variegations. Some random mutation that would never survive in the wild and only persists because we think it is pretty. A classic example would be hostas. Visit wild hostas in the forests of Japan, and you'll see solid green leaves. The various white and yellow patterns so familiar to us in our shade gardens are man-made (or at least, man-preserved) and if humans went extinct, would die out almost at once. My second picture, with the white and green steaked leaves would be another example of this type of variegation.

There are, however, some wild plants that have what I'd call adaptive variagation, white or other colored patches on their leaves that help them make a living in the world. I've talked before about the example of wild Caladiums which apparently use their white variegation to trick insects into not eating them.

The difference between adaptive and non-adapative variegation is like the difference between a very pale white person from Norway, and an albino from Africa. 
A blond Scandinavian
An albino african
Pale skin in Northern Europe is the result of adaptation over time to low UV light levels, allowing people to get sufficient vitamen D during nearly sunless winters, and is caused by many different genes interacting to lower skin pigmentation. Albinoism, on the other hand, is a simple mutation in a single gene that knocks out the production of Melanin, and isn't at all beneficial in a region with intense sunlight.

The two types act differently when it comes to the next generation as well. The children and grandchildren of an albino will either be completely albino, if they ended up with two copies of that gene, or dark if they don't. It is a recessive gene, like the recessive gene for most non-adaptive variegations described in the question.

The descendants of a marriage between a Norwegian and an African, on the other hand, will have many different skin colors. Dark skin tones tend to be dominate in the first generation (just as Henry sees the white midrib as dominate in the first generation of crosses with Hippeastrum reticulatum) but in subsequent generations, we don't see white or black, but a whole range of beautiful colors (just as Henry sees the yellow mibribs in subsequent generations) as the many different genes controlling skin tone get arranged into new combinations each generation.

But... this just scratches the surface of the fascinating world of variegation. After all, an albino human has a mutation that makes it impossible for their body to produce melanin, they aren't variegated with blotches of different colors. A plant with the equivalent mutation would produce no chlorophylle at all, which would quickly make it dead. So how do plants get white leaf edges and green centers, or an mix of green and white? The adaptive variagates do it through having a bunch of genes that carefully contol where to express pigment and where not to. For the non-adaptive variegation, it gets very strange and very cool... So tune in next week for Variegation Sciency Answers Part 2, featuring mythical beasts and jumping genes!

15 June 2011

Why scientific names change, and why you should be happy about it

Gardeners LOVE to complain about plants changing their scientific names. I certainly do it as much as anyone else (I even sing about it) but, though I certainly wish the new names could be easier to spell and pronounce, I actually don't mind it too much. Let me explain.

Scientific classification of organisms changes are we learn more about them. Go far enough back in time, and people classified whales as fish. As we learned more about them, however, that classification became obviously incorrect. Whales may live in the ocean, like fish, but they breath air, are warm blooded, and produce milk. Whales, it is clear, are mammals, like us and dogs and elephants, not fish. So the official classification changed.

For as long as scientists have been classifying things, they've been doing it based primarily on what they look like. Taxonomists peer at tiny details of flower structure and pollen grain shape and decide "I think that's an aster" or "Salvia, for sure." Recently, however, there has been a revolution. We've started looking at plant's DNA.

DNA sequence is the ultimate answer for deciding what is most similar. Two plants may look similar, but look at their DNA, and you can see exactly how different they are.

The result has been chaos in the world of scientific names. The genus Aster has been split into a billion pieces. Your Sedum 'Autumn Joy' is now Hylotelephium. It is frustrating (though, you gotta admit, Hylotelephium is REALLY fun to say!) but there is good news. You can't get any more fundamental than DNA sequence, so once this wave of revisions is over, names should be more stable than they have been in the past.

The other good news is the new names actually accurately reflect plant's relationship to each other. And why should you care about that? Well, let me give you an example. Take Hibiscus syriacus, the hardy, shrubby Rose-of-Sharon. Many gardeners still know it as Althea, which is the genus of mallows. Althea, Hibiscus, who cares? Well, you should. Knowing it is a hibiscus, breeders realize that it is closely related to other species of hibiscus, and started trying to make hybrids. One result is this lovely plant:


Hibiscus 'Tosca' (image from Arrowhead Alpines -- where you can buy it!) This is a hybrid between H. syriacus and H. mutabilis with bigger flowers on a bigger, more vigorous plant! Knowing it as althea would only result in unsuccessful attempts to cross it with a mallow. Better names make for better breeding which means better plants for you in your garden.

18 April 2011

Sciency Answers: Wood chips and nitrogen

Nancy has a question:

Hi, Joseph!  Looking for a Sciency Answer.
I keep reading that you can't use wood chips as mulch in gardens as it robs the garden of nitrogen.  Is that so?  How does that work?  What can I do about it?  Just add more fertilizer?  Wood chips are such cheap and easy mulch.
Thanks,
Nancy

The all importance of nitrogen
Wood chip mulches, and other high carbon, low nitrogen mulches, can suck up some of the available nitrogen in your soil. This happens because mineral nitrogen is essentially not just for plants, but for all life. Nitrogen is a key ingredient in proteins, and are a fundamental part of how life on earth works. The genes in our DNA are simply blueprints for making proteins, proteins which go on to build our entire bodies. No nitrogen, no protein, and without protein, no life. Which applies to all the soil microorganisms that want to decompose your woodchip mulch. To build their bodies and make their cool wood-digesting enzymes, they require nitrogen, specifically, mineral nitrogen, the form they can use. But mineral nitrogen is often in short supply in the soil. Everything wants it, and yet it is very easily leached away by rain water, and in the right conditions, can be converted into nitrogen gas which simply floats away in the air (forming, indeed, 78% of the air we breath). Only a few organisms, most famously the rhyzobium which form symbiotic partnerships with the roots of legumes like beans, can convert the gaseous nitrogen back into the mineral form other organisms can use.
So nitrogen is a key building block of life, and often scarce.

Carbon = food
Carbon compounds, on the other hand, from sugars to starch to wood, are primarily food for soil life. When a leaf or branch falls to the ground, all sorts of bacteria and fungi quickly begin munching away on it, breaking down the carbon structure to release the energy in it to power their life. When you, the gardener, take a whole bunch of carbon, in the form of wood chip mulch, and put it on the soil, the microorganisms rejoice and start reproducing like crazy. "So much food!" they say, "Let's all have a million babies to eat it all up!" But remember, each of those little baby bacteria requires a bit of nitrogen to live. If there is a lot of nitrogen in the soil to match the amount of carbon food sources, the microrganism population skyrockets and rapidly gobble down the organic matter, releasing all sorts of nutrients and making a lovely rich soil in the process. It is this balance of nitrogen and carbon that people aim for in their compost piles to achieve extremely rapid decomposition.
 When nitrogen runs low
If, however, there is a shortage of nitrogen, and lots of carbon, the bacteria are limited. Without enough nitrogen, they can't reproduce to match the food supply, so any bit of loose nitrogen they find floating around gets quickly snatch up and used to make more bacterium and fungi babies. With microorganisms scavenging up any loose nitrogen they can find, it doesn't leave much for plants to use to build their proteins and chlorophyll. The nitrogen has been immobilized. It is still there, just microorganisms are busy using most of it. Over time, however, as the microorganisms finish eating up all the carbon, they run out of food, and begin to die, releasing the nitrogen in their bodies back into the soil where plants can take it up again, re-mobilizing the nitrogen.
The wood chip nitrogen sponge
So when you add a layer of high carbon, low nitrogen mulch like wood chips to your garden, they act like a sponge, soaking up some of the nitrogen from your soil, and then gradually released it again. If you already have a shortage of nitrogen in your soil, this can cause a shortage for your plants , but you can solve that by simply adding a high nitrogen fertilizer, whether it be synthetic or organic fertilizer like manure, to make up the difference. And actually, adding nitrogen with carbon is better than just putting down the nitrogen fertilizer by itself. If you add concentrated nitrogen along, it will be instantly highly available to your plants, but it will also quickly leach away into the ground water, away from your plants that need it, and polluting streams and wetlands, forcing you to keep fertilizing to keep your plants growing happily. Combine that nitrogen with a lot of carbon, like wood chips, however, will keep the nitrogen around, releasing it slowly and stably over time, keeping your plants happy and minimizing polluting run-off.
The bottom line
So yes, wood chips can soak up nitrogen, but that is actually kind of a good thing. And the reality is, the effect is pretty small, and you don't need to worry about it in most cases. In my vegetable beds, where I want my plants to grow very rapidly and lushly in a single season, I add a higher nitrogen layer of compost annually along with new layer of wood chip mulch to keep the nitrogen abundant. In my ornamental perennial and shrub beds, however, I pretty much just mulch with wood chips, only adding compost if the soil is particularly poor and plants aren't growing well. Most plants don't really need high fertility levels. Extra nitrogen will help they grow bigger and faster, but for many flowers, that actually just means they are more likely to fall over and require staking, and sometimes even produce more leaves at the expense of flowers. I give a few greedy flowers, like my lilies, a big dose of compost every year to really push them to decadent proportions, but other wise, wood chip mulch produces healthy, happy plants for me.

In short, say yes to wood chip mulch!

Have a question? Get a sciency answer! Just e-mail me: engeizuki at gmail dot com

04 April 2011

Sciency Answers: Fertilizers: Organic, natural, conventional or... what?

Dave sent me a question -- asking about my thoughts on some specific natural fertilizers that had been recommended to him. So, today's sciency answer is a quick run down on different types of fertilizers.

There are tons of differents kinds of fertilizers -- conventional liquids and powders, and a seemingly endless array of different organic options.

The first thing to say is:
Your plants don't care.
A plant's roots absorb certain specific compounds from the soil. And the phosphorus they get from an organic fertilizer is identical in every respect to the phosphorus they get from a synthetic fertilizer.

Which isn't to say what you choose doesn't matter. How a fertilizer is produced has an environmental impact. Synthetic nitrogen fertilizer is produced by the Haver process, an effective but energy intensive method to convert the nitrogen gas in the atmosphere into forms of nitrogen plants can use. Phosphorus for conventional fertilizers are actually mined -- and minable phosphorous in the earth is a non-renewable resource, and at our current usage rates, we're predicted to run out in about 30 years (A nice article on the topic from Slate: http://www.slate.com/id/2258112/entry/2258053/). In contrast, organic fertilizers like compost or manure let us recycle the nutrients we have. Though it is worth mentioning that shipping some sort of special organic fertilizers from across the country isn't going to be exactly carbon neutral either. Like very thing else, local is the best here.

The other big difference between different sorts of fertilizer is how concentrated and how "fast acting" they are. Highly concentrated fertilizers, like the genetic bag of 20-20-20 synthetic fertilizer OR the highly purified equivalent organic fertilizer bags, usually break down quickly in the soil releasing lots of nutrients in a rapid burst. This gives a satisfyingly rapid response from your plants, but also makes it much more likely you'll over fertilizer, potentially harming beneficial soil biology, and much increasing the risk of polluting fertilizer run off into ground water and wet lands. Most less concentrated fertilizers, like compost, don't release nutrients right away. Rather, soil microbes have to further decompose the compost to actually break down the nutrients in it to the forms plants can uptake. The result is a much slower response from the plant, with fertility that stays more constant, and much less chances for overfertilizing and polluting run-off.

The final benefit of using things like compost as a source of fertility is that they provides food for a whole host of soil organisms, creating a healthier, richer soil that retains water better, promotes healthy root growth, and allows plants to better utilize the nutrients that are already there.

So, in short: Highly concentrated, fast-acting fertilizers (organic OR synthetic) can give you impressive, quick results, but don't do anything for your soil, and can easily lead to polluting run-off. Less concentrated, slow-release fertilizers, like compost, take time to show results, but produce healthier soils that can grow great plants consistently over time. So in general, I am skeptical of any special fertilizer. Organic or not, the basic chemicals of fertilizers are all the same, and anything that will show results over night is probably not great for your garden in the long term. In the end, the basic standards, just local compost and mulch, are the simpliest, easiest, and best.

05 February 2011

Sciency Announcement!

Okay folks, you love Sciency Answers on my blog... now you can experience Sciency Answers -- LIVE! I'm going to be speaking at the Spring Into Gardening Conference Saturday, April 30th, put on by the Isabelle County Master Gardeners here in Michigan. It'll be a great program with some other great speakers, so if you don't live too far, do come and see what I look and sound like in person!

Also, if you are interested in having me speak at your conference/event/gathering/bar mitzvah/wedding/graduation/whatever I'd love to do it -- just shoot me an e-mail: engeizuki at gmail dot com

31 January 2011

Sciency Answer: Too much compost? (Plus! Fun with lime!)

Leslie, who blogs over at Mountain Plover blogs.icta.net/plover, send me a great question.

My question is about adding compost... can you add too much? And if so, what harm does it

In my master gardener training, we were told to always recommend adding 4 inches of organic matter, dug in 8 - 12 inches. Colorado soils are notorious for their lack of humus. However, my brother-in-law (who lives near Denver) had a soil test (from an independent lab) come back telling him he had too much compost! (He has been growing veggies for a number of years, adding compost and shredded leaves to the soil every fall.) Apparently, this was throwing his other minerals out of balance. They actually recommended adding lime and gypsum, two things CSU told us to avoid. Now I'm totally confused.

"The compost and leaves have narrowed the calcium to phosphorous and the calcium to potassium ratio. Both should be 18 to 1. The reason a small amount of limestone is added is because calcium and potassium compete for space on the clay colloid. When limestone is applied it will push potassium off the clay colloid and then be taken up by plants or will leach below the root zone. This is a little trick to help reduce excessive potassium faster. The gypsum is applied because it will help correct a serious situation in your soil: excess sodium. Once applied, the calcium and sulfate in gypsum will disassociate. The sulfates combine with sodium to become sodium sulfate and is leached in the presence of adequate moisture. This will help reduce your sodium level. Having sodium at 166ppm is much worse by far than having calcium at 8000 lbs. per acre or even higher. High calcium levels are not that much of an issue. Calcium nitrate is applied to bump up the nitrates in the soil for quick, early growth in the spring. The amount of accumulated calcium will be negligible."

Whew! What a lot of great questions! And a lot of excessively technical language from the soil lab. I'll try and break this down in bits and see if we can make sense of it all.

Fertilizer Vrs. Soil Amendment
When thinking about adding stuff to soil, I like to mentally break things down in to two categories: Soil amendments and fertilizer. I think of things like peat moss, charcoal, sand, as soil amendments. Their primary purpose is to change the texture and structure of your soil so it is a better space for plant roots and beneficial microorganisms to grow in. Fertilizers, on the other hand, are plant vitamin pills, providing specific chemicals they need to supplement their main diet of carbohydrates they make from water, sunlight, and air. It is pretty hard to overdose on most soil amendments. You can't really have too much organic matter in your soil – after all, peat or coir based potting mixes are essentially 100% organic matter. Fertilizers, on the other hand, are usually damaging to plants at high levels, just as you can overdose on almost any vitamin.

Compost is, of course, both a fertilizer AND a soil amendment. Compost has a lot of organic matter which improves soil texture, and it also has varying amounts of nitrogen, phosphorous, etc. The exact amounts will vary widely depending on that your compost is made from, but certainly you can add too much fertilizer by adding too much compost. The most common compost over-dose, in my experience, is adding way too much nitrogen when using composted manure, but you can overdo other elements as well.

To lime or not to lime?
The rest of Leslie's question is interesting because it make, once again, the point that all gardening is local. The soil testing lab recommended adding lime and gypsum – but her Master Gardening training at Colorado State said to avoid both of those! What gives?

The usual reason to add lime or gypsum to soil is to correct a calcium deficiency, and/or to make a soil less acidic. Where I live, we get around 30-40 inches of precipitation a year and all the water leaches out the alkaline chemicals, usually producing an acidic, calcium deficient soil. Around here, adding lime is pretty much standard practice. Leslie gardens with only 16 inches of precipitation a year, and that lack of water lets calcium build up in the soil, so adding more is just making a problem worse. There are exceptions to the rainfall-soil pH connection of course... lucky people like Gail who, thanks to limestone bedrock, have alkaline soil despite a wet climate. I gardened briefly on limestone when I was at Ohio State... it was a pain. Suddenly rhododendrons went from over-planted and boring to difficult and desirable. Because wet, alkaline soils are rare, it is hard to find plants adapted to those conditions.

All of which is a bit beside the point in this case. The soil lab is recommending lime and gypsum here for a different reason. Leslie's brother has too much potassium and sodium in his soil, and adding lime and gypsum is a kind of chemistry trick to let those chemicals leach out of the soil faster. It will increase the amount of calcium in his soil, which isn't a good thing, but having lots of sodium is a much WORSE thing, so is the best option for the healthiest soil.

Get Tested
The bottom line here is: get your soil tested periodically by a qualified lab in your area. Soils vary radically depending on your climate, they type of bed rock you have, and how you manage it. Compost is a catch-all term, and composted cow manure is going to be very different than composted yard waste or composted coffee grounds. Find out what your soil is actually like now, so you can make the right choice on what to add to it in the future.

Have a question? Get a sciency answer! Just e-mail me (engeizuki at gmail dot com) or ask one in the comments!

24 January 2011

Sciency Answer: Damping off


Back in November, when I posted my Great Catalog List, I sang the praises of buying seeds. In the comments, Lisa said she would like to grow more from seed, but has trouble with things damping off, and asked if I could give some help.
So, today's Sciency Answer is: Everything I Know About Damping off.

What is it?
 Damping-off is a generic term for a number of disease (fungi and other bad stuff) that attack young seedlings. The seeds sprout, they look all happy, and then they start wilting and collapsing. It is pretty devastating, but quite preventable. You'll usually have problems with damping off if you have a LOT of fungal spores in your seed starting area for some reason, if your seedlings are weak or stressed, or if you keep the soil to wet. By following a few guidelines, you can keep your seedlings happy, the fungi unhappy, and your seed starting trouble-free.

Use sterile, high-quality potting media
I use Baccto, a sterile peat-based media, for my seedlings. There is nothing special about that brand, it is just what my favorite garden center carries. I know peat is controversial environmentally but it is also the best -- at least in my experience, and in the experience of most growers I have talked to. Feel free to disagree with me in the comments. I use a variety of other media for bigger pots and containers, mixing in my own compost and good garden soil along with peat alternatives like coir. But seedlings need the best, and since you only need a tiny container to get seedlings started, a little high-quality potting media goes a long way. Starting with sterile media means you aren't putting seeds into a giant population of pathogens waiting to consume them. I've read recommendations to top your media with a very thin layer of coarse grit, the reasoning being it will dry out quickly, making it difficult for fungi and friends to grow on the surface. I've never tried it, nor have I ever seen it used commercially, but it makes sense, and might be worth a try.

Use sterile containers
Either buy new ones for each batch of seedlings, or give them a soak in a bleach-water solution and rinse them thoroughly. Old, unsterilized containers can be loaded with potential disease.

Keep the air moving
This is critical. In perfectly still air, a layer of nearly 100% humidity hangs right over the moist soil, making ideal conditions for all the nasties to grow and attack your seedlings. A fan very gently keeping the air circulating breaks up that super-high humidity layer and will make a dramatic reduction in your disease problems. HAF (Hortizontal Air Flow) fans are ALWAYS used by commercial growers and should be by home seed starters as well.

Give them enough light, sun light if possible
If seedlings don't have enough light, they become long, leggy, and extra susceptable to disease. Many commercial available seed-starting light systems simply don't have enough bulbs to produce healthy seedlings. I use two big florescent shop lights side-by-side, for a total of four florescent bulbs over my seedlings, keeping them vigorous and healthy enough to fend off pathogens. Sunlight is extra beneficial, because the UV rays provide a sterilizing effect, knocking back the disease organsism at the soil surface. In cold climates like mine, sunlight usually isn't an option because I'm starting most of my seeds in the later winter when it is way too cold for my seedlings outdoors. However, when I do get a rare warm, sunny afternoon, I always rush my seedlings outside into a sheltered, lightly shaded spot. One year, I neglected to have a fan running in my seed starting room, and a tray of tomato seedlings started collapsing left and right, but a few hours of sterilizing sun stopped the disease in its tracks.

Keep 'em warm, with bottom heat if possible
If your house (or wherever you are starting your seeds) is on the cool side, giving your seedlings a bit of extra heat will help them germinate and grow quickly, getting them past that vulnerable just-germinated stage faster. Some seed companies, like Johnny's, will list the best temperatures for germination of each plant. If I can't find specific information for a plant, I aim for the upper 70s F (~25 C). The extra heat is best if provided from below with a seedling heat mat. Bottom heat encourages the roots to grow rapidly without causing the stems to grow long and floppy, producing healthier seedlings -- and healthy, happy seedlings resist disease the best.

Don't keep them to wet
Seedlings have tiny root systems, and can't be let to dry out too much, but keeping them constantly soggy is asking for trouble. I never let the soil dry out until the seeds germinate, but once they're up and have some roots, I try to let the very surface of the soil get a little dry before watering again. It can be a bit of a balancing act, but if you are doing everything else right, you'll have some room for error on the watering.

In an emergency...
Sometimes, despite your best efforts, your seedling start damping off. As soon as you see a seedling wilting despite the soil being moist, you know you've got a problem. First, get the diseased seedling, the soil and other seedling around them out of there as quickly as possible. One they're infected, you can't save them, and they'll only spread disease to your other seedlings. Then you need to keep your other seedlings from dying as well. I like treat them with hydrogen peroxide, watering them with roughly 1 part hydrogen peroxide from the drug store to 9 parts water. Hydrogen peroxide acts directly to sterilize the soil, and it also is used by plants to signal their natural defense systems to get up and running, so watering with it acts like a warning: "Hey! Damping off is coming!" 

What about commercial fungicides?
I don't spray any sort of pesticides (synthetic or organic) in my garden. If a plant can't cope, I pull it out, and find something better to grow. But I think fungicides make some sense for seeds and seedlings. When you spray a whole plant in the garden you have to use large quantities of the chemical and there is a high potential for it to drift, leach into ground water, and disrupt natural ecosystems. But treating a flat of seedlings under lights in my basement requires a tiny quantity of chemical with virtually no chance of it getting out into nature. That being said, I've never used fungicides on my seedlings -- the methods outlined above work fine for me, and I haven't seen the need. If you do, just be sure to do your homework to find the safest, most effective one possible, remembering that organics can be toxic and dangerous too!

Starting healthy seedlings isn't hard, provided you take the time upfront to create a seed starting area that promotes growth by seedlings not fungi. Now go buy some awesome seeds!

Have a question? Get a sciency answer! Just e-mail me: engeizuki at gmail dot com or ask it in the comments.

03 January 2011

Sciency Unreliability


Winston Churchill once famously said “Democracy is the worst form of government except for all those others that have been tried.” I think the same could be said of science.

I was thinking about this after my recent “Sciency Answer” about variegated plants. After I posted it, I had a couple of conversations with Kelly Norris on the topic. He read the studies I cited to support my explanation, and wasn't impressed with their technique and reasoning. I (obviously) was. The upshot is that I'm pretty confident variegation in wild caladiums (and other plants) is a disguise to prevent insect damage, and Kelly is very skeptical. Which is totally normal. Scientists often disagree about what studies mean, because scientists know a very important thing about science: It is often wrong.

Since I'm now in the business of dispensing sciency answers, I thought I should talk about that. About why science is so often wrong, why some of my answers may prove to be wrong. There are lots of reasons, but I think one of the biggest problems is people like me -- Graduate students.

Graduate students like myself are the people in the lab (or field or hospital) doing the actual work of most of the scientific research going on these days, and we have a HUGE conflict of interest that effects any sort of research we do. We desperately want to graduate.

In order get my PhD, I do research. In my case, research on petunias. I perform experiments, write up my findings as a dissertation, and hey presto, you have to call me Doctor. Unless, of course, my research doesn't work and I don't find anything interesting. To use an extreme, completely made up example: if I was studying the effects of chewing gum, and found that it caused cancer, WOW! That's shocking! It gets published in a fancy journal, I get a degree, I get a job, and everything is wonderful. But if chewing gum doesn't have any effect at all... I'm screwed. No chance of a good publication, no job, and maybe even no degree unless I start over with a new line of research.

This isn't just true for graduate students. University faculty need to make tenure, they need grants, and to get all that, they need publications. Publications from research with big, interesting findings.

In response to all the pressure to find results, people do sometimes make stuff up, but most of the time they do something more subtle, perhaps even unconscious. They overlook alternative explanations, massage their data, or keep asking the same question a different way until they find something that passes the test of statistical significance. Chewing gum may not cause cancer but it must do something... gum disease? Jaw injury? Stress? Divorce rate? Ask enough questions, and even if just by chance, the numbers will tell you one is right.

Because of that, new scientific findings tend to overstate the case – they find big, dramatic effects that sometimes prove to be weaker, or nonexistent in future studies. Science does however, eventually, tend to correct its own mistakes. Since no one currently believes chewing gum is dangerous, a study finding it to be safe is boring and unpublishable. But if someone else had said it did cause cancer, debunking that finding would be very publishable. That's why in significant areas of research we get dueling studies (Eggs are good for you! Eggs are bad for you! No, they're good for you!) but over time, eventually, we can look back over all the studies, compare them, and finally (hopefully) come to a conclusions that is close to actual reality.

That is why, despite all its flaws, I believe in science as a powerful way to understand how the world really works. Just don't confuse science with the actual truth. Truth is something we strive for, but can never really, absolutely, know.

13 December 2010

Sciency Answer: Variegated plants are liars

Dear Mister Greensparrow Gardens Person:

I have a SCIENCE QUESTION (dah duhduh DAAAH) about variegation. Isn't the point of a plant being green for good light wavelength absorbency? I mean, plants that are other colors besides green still absorb most of the spectrum because of different kinds of chlorophyll, etc. But what about the plants that are variegated to have mainly white leaves? What is up with that? Doesn't the color "white" mean that all the wavelengths are reflected back? So how would they photosynthesize properly if they couldn't trap light efficiently? With some of these plants, there is still some green or other color, but it doesn't seem like it would be enough to support such a big plant. 

-Hannah

You are absolutely right -- completely white sectors on leaves don't photosynthesize, and plants that produce whiter leaves are going to be inherently less vigorous than ones with green leaves. So why are they like that?

Most variegated plants are essentially man-made -- they are unhealthy, mutant freaks that would die if we didn't like them and keep them alive in our gardens. Sort of like chihuahuas (except chihuahuas are disgusting and variegated plants are delightful.) Surprisingly, however, some wild plants, like some caladium, begonia, and dieffenbachia naturally have white patches on their leaves. Breeding has increased the amount of white on the plants we grow, but still, the wild plant have distinct white patches on their leaves. Why?

Because they are liars.

Imagine for a moment that you are a expecting mommy-to-be leaf miner. You are flying about, looking for a good leaf on which to lay your eggs so your babies can happily start eating away at them. First you see a leaf like this:

photo credit
This leaf is already infested with leaf miners. Lay your eggs on that leaf, and your babies will starve, because there isn't enough leaf to go around. So you keep flying, and see a healthy, green leaf like this:


This looks perfect! You land, and lay some of your eggs, and then happily fly on to find a home for the rest of your brood. But the next leaf you see looks like this:
photo credit
This leaf looks TERRIBLE! There must be a million leaf miners and caterpillars already there, munching away for this leaf to have so little green on it. So you fly on... fooled by a sneaky, variegated plant. The plant has made a trade off: less efficient photosynthesis in exchange for not being eaten alive.

In other words, natural leaf variegation is the plant equivalent of pretending you have whiplash in order to get insurance money. This is a fact that should make those of you who don't like variegated plants because they look unhealthy rethink your position. That is just what those plants WANT you to think! You are being fooled, just like the little leaf miners. Go buy some today just to show those plants you are smarter than them.

If you want more of the science behind white leaves, here are some good papers (subscriptions required):
The history of research on white-green variegated plants
Ecology of a leaf color polymorphism in a tropical forest species
Leaf variegation in Caladium steudnerifolium (Araceae): a case of mimicry?

Have a question? Get a sciency answer! Just e-mail me: engeizuki at gmail dot com

06 December 2010

Sciency Answer: Seed cleaning and sprouting

Today's question is from Keith Long, brought on by a comment this post on his blog:

My question is about Rhodochiton astrosanguineum seeds.
When you buy these they're very small seeds with the husk (of each seed) removed. Yet the germination rate is very poor. Either that or the the type of people who buy them clearly are incapable of following their instructions!
Yet once you have a plant, and have collected the seeds, the germination rate is near 100%. Clearly, I don't mess about removing the individual seed husk, I just put the seeds in. The seeds in their husk are nearly the size of a chilli seed.
Why are they husked? Why does this lead to such a low rate of germination? And merely out of interest, how on earth do they do it without losing the minute seeds?

The factor here is almost certainly not the husk covering the seed, but the freshness of the seeds. Many seeds rapidly loose their viability, and need to be sown right away, while others simply start taking longer to germinate the longer they sit around dry. Based on my poking around, it appears that very fresh Rhodochiton seeds germinate rapidly and easily, while older seeds will still sprout, it just takes significantly longer.

Which makes one wonder... why would seeds do that?

A gardener, of course, wants every seed to sprout as soon as it is planted. But in the wild, plants need to be more careful. If every seed sprouts right away, one flood or late frost can wipe out the entire next generation. So most wild plants have various tricks to ensure seeds don't germinate all at once, or germinate at the best possible time. For a plant like Rhodochiton, fresh seed that falls on moist soil will sprout right away, getting a quick start on the next generation. But any seeds get a chance to sit dry for a while drop into a deeper dormancy and hang around without sprouting, acting as a sort of insurance policy to make sure there are still seeds around if something happens to those that have already germinated -- much as gardeners usually don't plant the whole packet at once in case of damping off.
How readily or uniformly seeds sprout often depends on the climate they evolved in. Plants from desert areas with erratic rainfall are notoriously hard to get good germination from, instead one seed at a time will sprout over a very long period -- extreme insurance for a difficult, erratic climate. Plants from wetter, more predictable climates tend to have seeds that sprout more uniformly.
Plants that have been grown for a long time by humans almost always develop quick and uniform germination because without even trying to, we tend to select the individuals that sprout first. If you sow 100 seeds, and 10 sprout in a week, most people just prick out those ten and forget about the other 90, even though they may have eventually sprouted. Those quick germinating seeds will go on to have more rapidly germinating offspring, and so on, until they all sprout at once like most familiar annuals and vegetables.

To get to your other questions about removing the husks, seed companies usually remove them for a number of reasons: It looks neater and tidier in the seed packet, the cracks of crevices of the husks can offer ideal little hiding places for fungi. In some cases, it also allows the seed producers to get a good look at the seed itself and separate out small, shriveled seeds that are unlikely to germinate.
Cleaning off all the husks and chaff of seeds can be rather a pain. I worked for a while for the Ornamental Plant Germplasm Center, and spent quite a bit of time cleaning seeds. The first step is usually to gently rub the seed heads between to rubber blocks, which crushes and breaks up the seed husks. You can then separate the chaff from the seeds a number of ways. A fine sieve will let fine seed fall through but keep big chunks of chaff behind. We also had a cool machine which was basically a big plastic tube with a fan in it which allowed us to blow off the light chaff but leave denser seeds behind. Various other shaking, blowing, and sieving machines are used to rapidly get all the seeds in one pile and the other stuff in another. It is kind of cool, but when you are working with many different species as we were, you have to figure out the best machine and setting for each species, which can lead to a frustrating amount of trial and error.

Have a question? Get a sciency answer! Just e-mail me: engeizuki at gmail dot com

01 December 2010

Science Answers: tap water versus rain water

Another great question from Annie of Annie's Annuals:

Is there something special about rain water ? I mean beyond "hydration"? As we are a Mediterranean climate here in the Bay Area, we have to use city water all Summer .  Then, after the first rain everything goes bonkers and all my garden plants seem to grow quite a bit overnight and vibrate with inner happiness.  No, I'm not currently on drugs and I swear this is true. I notice it every year. I know its not that they get watered deeply for the first time in a while- because our waterers  at the nursery water everything  every day whether I like it or not!  Can you solve my mystery?

I think I can solve your mystery. Let me start by telling you about another mystery.

Columbus Ohio has a lovely public conservatory which had a marvelous collection of palms. These palms had been happily, healthily growing for decades, then started mysteriously wasting away and dying. The workers at the conservatory hadn't started doing anything new, the plants weren't diseased or infested with insects. At a loss, they enlisting help from horticulture professors at Ohio State who determined the soil pH was WAY too high. Which was an answer, but lead to another question. They had been maintaining these palms the same way for decades, and everything had been fine. Why would the soil acidity suddenly get all out of wack?

Water.

The city, it turns out, gets water from three different treatment plants, and each uses water from different reservoirs and/or wells, making the water from each plant chemically different. As the city grows and changes, they sometimes switch a neighborhood from water from one plant to another, and they had changed the source for the conservatory's tap water -- but didn't mention it to them. After all, water is water, right? Nope. The new water source was radically more alkaline than the old one and suddenly all the plants that had been vibrating with inner happiness were stressed and dying. The conservatory started pH testing and treating their water with acid, and the remaining palms were saved though many beautiful trees had already died.

(a moment of silence for the palms)

The sad story of the palms goes to show that sources of water can be pretty radically different and have a big effect on plants. Truly pure water essentially doesn't exist. Water is sometimes called the universal solvent because almost anything can, and does, dissolve into it. Even ultra-super-extra-triple distilled water won't stay perfectly pure for long. As soon as it is exposed to air, carbon dioxide will dissolve into it and make it slightly acidic. So don't be fooled by "pure" bottled waters. If it was truly pure, it would cost a lot more (ultrapure, research-grade water costs about $25 a liter), and besides, extremely pure water tastes unpleasant, and isn't good for you.

City water comes from various sources like wells, lakes, rivers and treated sewage (yum...) and picks up all sorts of different minerals, salts, and gasses along the way. Water treatment plants remove some of those compounds, add others, and sterilize it to make it safe for people to drink. The emphasis here is on people, and some water treatments aren't all that good for plants. Some plants are sensitive to chlorine, and water softeners take out excess dissolved minerals in water (which are mostly fine for people or plants) and by replacing them with dissolved salts (which are very bad for plants). Rain water generally has less stuff dissolved in it than tap water, but it isn't pure either, not by a long shot. Clouds contain not just water, but also various dust, gasses, and (unfortunately) industrial air pollution, making rain water chemically different than tap water.

So how might the difference between rain water and tap water be effecting your plants? As demonstrated by the palm story I started with, pH could be a big one. Rain water is slightly acidic (or not so slightly, if you've got acid rain) whereas most tap water is alkaline due to dissolved minerals. It may be that over the summer your soil pH slowly goes up, out of the plant comfort zone, and then gets brought back down with the arrival of the fall rains. You could test this theory pretty easily be measuring your pH before and after the rains start.

Another option would be mineral and salt build up. Most tap water contains a fair amount of dissolved minerals, and fertilizers (of any sort -- organic or synthetic) are salts. As water evaporates from the soil, it leaves the minerals and salts behind, which over time can affect the health of the plants. In extreme cases, like house plant that have been around forever, you might even see a crusty white layer on the surface of the soil. Rain water is purer than most tap water, and coming in large amounts could flush out the excess minerals and salts letting plants grow more happily. You could sort of test this one by comparing your soil's salt concentration before and after the rains with an EC (electical condictivity) meter.

It could also be nitrogen. I didn't realize this until I started researching this answer, but rain water can have significant amounts of nitrogen in it (but, then again, so can tap water, especially in agricultural areas). The papers I've looked at on the subject find the amount to be pretty variable by region and season, so your local fall rains may or may not be giving your plants a fertilizer boost along with hydration.

Finally, as I mentioned above, the water treatment process adds chemicals like chlorine to tap water, which some plants are sensitive to. These may be slowly building up in the soil over the watering season gradually hurting the health of the plant.

In short, rain water is very different from most tap water, and the "inner happiness" your plant exhibit with the arrival of fall rains isn't a figment of your imagination nor a drug-addled hallucination, though it is hard to say for sure which factor or combination of factors are responsible for their joy.

Have a question? Get a sciency answer! Just e-mail me: engeizuki at gmail dot com.

15 November 2010

Sciency Answers: Rooting cuttings

Today's question is from Loree, of Danger Garden fame:

I have a couple of Echium that I've grown extremely attached to. I know there is no chance they are going to winter over here and I don't have any more space to dig them up (they've gotten huge!) and pot them with the hope of their surviving. I'm wondering if you can talk me through the process of trying to propagate from a cutting. I have both soft wood and hardwood on my Echium fastuosum, “Pride of Madeira" (at least I think I do!?) what is the best to take a cutting from? And then what do I do. Hope you can help,

Indeed I can! Here is my Sciency Answer:
Rooting cuttings is a pretty good trick. You take a piece of a plant lacking a very important organ, roots, and convince it to grow new ones. This is possible because plant cells are 'totipotent' meaning one type of plant cell can change into a different type of plant cell. Our cells can't do that -- our skin cells can only produce more skin cells, etc, and when you cut off one of our legs, we can't grow a new one. The only human cells which are totipotent are those embryonic stem cells you keep hearing about. But all plant cells are essentially embryonic stem cells. When you take a cutting, the plant goes, "Whoa! No roots!" and starts trying to make some. At first, all the cells are busy being specialize to form bark or stem or buds. But some of those cells de-differentiate into generic cells called callus, and then those callus cells change into roots. This process takes time, of course, and during that time the plant has no roots, so is very vulnerable to drying out and dying.
To deal with that reality, all the procedures for rooting cuttings are designed to do two things: Speed up root formation, and keep the plant alive in the mean time. As a general rule, younger, softer, tender growth is quicker to make roots, but also quicker to wilt and die, while older stems may take longer to root, but tend to hold up better during the wait. When you see instructions for taking cuttings that recommend soft wood or hard wood cuttings, you are just seeing what, in other people's experience, is the stage of growth which best balances, for that particular plant, rooting quickly and not dying. For some easy-to-root plants, this is merely a suggestion. For others, one particular stage of growth may be the only time you have a reasonable chance of success. To move from the general to Loree's specific question, it appears that for echium, the best stage is softwood, meaning new, tender, freshly sprouted growth.
Once you've taken your cutting, you need to provide a special environment to help it survive. The first requirement is usually extremely high humidity to keep the plants from drying out before the roots get going, unless the plant in question is a succulent or a desert plant able to cope with very low water. Commercially, this is achieved on benches in a greenhouse which are automatically sprayed down with a fine mist every couple minutes. This is excellent, but not practical for most of us. At home, my default method is a zip-lock bag. I put some moist (not wet) potting soil in the bag, shove my cuttings in, and seal the bag. I should add here that though some cuttings will root if placed in pure water, I would never recommend it. It looks cool, but everything that roots in water will root more happily in good potting soil, and roots formed in water are physically different (because of a lack of oxygen) than roots formed in soil, so transplanting from water to soil can be a shock for the young cutting. Moist vermiculite or water-holding florist foam (eg, Oasis) are both also good alternatives to standard potting media. I always use potting media because that is generally what I have around, but you may want to experiment.

(I had fully intended to have a cute little photo of happy cuttings in a zip-lock bag at this point in the post. But I didn't get around to it. So you can use your imagination instead.)

With your high humidity provided to ensure your cuttings don't wilt and die, you now need to encourage the things to grow roots. There are a couple things you can do to help this process.

Light: Light is essential. Growing roots requires energy, so the cuttings need to photosynthesize as much as possible. This can be a balancing act -- too much sun can dry out the cuttings, or overheat ones in a sealed bag. I tend to aim for light, dappled shade under a tree in the summer. Florescent lights also work great because they produce a fair amount of light without a lot of heat.

Bottom heat: If possible, keep the bottom of the cuttings warmer than the tops by placing them on something warm, like a seedling heat mat. Warmth speeds up cell division at the bottom of the cutting, shortening time to rooting. Keeping the tops of the cuttings cooler keeps them growing slower and using less water while the roots are developing.

Rooting hormones: The plant hormone auxin promotes new root formation. You can buy auxin preparations specifically for rootings cuttings either as a powder or liquid you dip the end of the cutting in before sticking it in the media. Many cuttings will root on their own, but hormone treatment will usually speed up the rooting process and increase your percent success. In many species, the exact ideal concentration of hormone to apply for maximal rooting has been identified. I doubt anyone has done that study for echium, so you might want to try treating at different rates and see what works best for you.

Wounding: This may seem counter-intuitive, but for many species, cutting or even crushing the end of the cutting promotes rooting. In essence, this exposes more cells to the hormone treatment, and gives more cells a chance to divide and switch into roots. Depending on the species, sometimes this helps, sometimes not, as wounding can also promote rotting. Again, you might want to play with it and see what works best for you.

Then you just wait for roots to form. Telling if there are roots or not can be difficult because, obviously, the roots are going to be out of sight (I guess this would be the only benefit to rooting in water). The oft repeated advice is to tug gently on the cutting and see if it resists or not. The problem with this advice, at least for me, is that it only works for plants I don't care about. When I'm rooting a few odd coleus, I generally forget about them for a few weeks, then give them a solid tug which is solidly resisted by their roots and I know they are ready. For precious plants I end up fussing with them practically day, generally tugging too gently to be able to tell if they've rooted or not, sometimes tugging to hard at just the wrong time and ripping off just nearly developed roots, which is fairly devastating. So I use other clues. A good one is to look for new growth. Until roots form, the cutting will probably not really grow, so new leaves usually (not always) means new roots. If you are rooting in a zip-lock bag, you can also watch for roots to show against the clear plastic. If in doubt (and I frequently am), gently lift the cutting with some soil, and gently wash or shake the soil away. If the end of the cutting looks just like when you stuck it in, you've got a while to wait. If you see lumpy whitish or brownish bumps on the bottom, you are in luck, that is callus, the first step to roots. If you see roots, of course, you are home free.

Once your cutting has rooted, you need to slowly acclimate it to the harsh real world. Commercially, this is done on a bench next to the mist benches where humidity is still high, but the cuttings aren't getting directly sprayed. If you've rooted in a plastic bag, first open the bag, then gradually, over a course of days, roll the top down until the cutting is out in the real world. With cuttings I care about, I do as I've just written. With things I don't care so much about, I just open the bag one day, nothing gradual about it. Generally things take this just fine, provided they've had time to develop a good root system. Then you can pull the rooted cuttings out, stick them in pots, and smile at them with smug satisfaction.

If, by the way, you are interested in learning more about the art and science of plant propagation, Ken Druse's Making More Plants is excellent. Very thorough, very readable, and, like all of Ken's books, very beautifully photographed. For an even more in depth but much drier presentation, the standard textbook on the subject is Hartmann and Kester's Plant Propagation.

Have a question? Get a sciency answer! Just e-mail me: engeizuki at gmail dot com

08 November 2010

Sciency Answers: Overwintering tender plants

I've gotten a couple questions from people about how to over winter tender plants indoors -- Cathy asked about some species of tender salvia, and Joel asked about echium, so I thought I'd do a little (or not so little) Sciency answer on the basic principles of overwintering stuff.

First, I've got to tell a story. I was a student at Ohio State, and my friend Beth was teaching me to drive (Yes, I didn't get around to learning to drive until I was 22... I actually took my driver's test the same week I took the GRE for grad school. Aced the GRE. Technically failed the drivers test, but the testing lady was nice and let me get my license anyway. No, I'm not really one for practical life skills... which is why I get on so well in grad school.) So we were driving slowly around neighborhoods in Columbus when I suddenly slammed on the breaks.
"Um... there is no stop sign." Beth said.
"Those are BANANAS!" I yelled as I jumped out of the car. They were bananas -- over a dozen 10 foot tall banana plants with fruit on them. In Columbus Ohio. Zone 5. I ran up to them and admired their beauty, then knocked on the door to ask them how they managed to pull it off.
Turns out it was simple. Every fall they dig them up, knock most of the soil off, cut off all the leaves, and throw them in the basement. Come spring, they shove them in the ground, and the bananas take up where they left off. That is the beauty of bringing in tender plants -- you can grow all kinds of cool stuff that you wouldn't be able to otherwise, because while it may be a zone 5 winter outside, in the house it is a solid zone 10. So every fall, I bring in loads of plants. Sometimes I plan ahead for this, growing things in containers that can easily be moved, or taking cuttings of large plants in the late summer. But more often I see frost on the forecast, look at some cool plant I was growing as an annual, and decide to dig it up, cut it back, and see if it will make it. Usually they do. I've actually had very few failures, provided I follow these rules:
My rosemary standard has been wintering happily indoors for several years now
1. Don't expect them to look pretty. My goal for most things is merely that they survive. Some plants will look marvelous indoors all winter, but most others will limp along, loosing a leaf here, getting leggy and ragged looking -- but they survive, and come spring I cut off all the raggedy growth, and pretty soon they're looking gorgeous again.
Various small, tender things in my sunniest window.
2. As much light as possible. This is a no brainer. Shove everything in the sunniest windows you have. Florescent lights are wonderful for plants, so if you really have a lot of plants to bring through, invest in a few shop lights. Oh, and don't bother with "grow light" bulbs. They don't make plants grow any better, they're just designed to make plants look prettier. So unless you are displaying them in your living room, any old florescent bulb is fine.
My elephant ears always look sad over the winter, but perk up as soon as they go back outside.
3. As cool as possible. This may seem counter-intuitive, but in my experience it is the most important thing of all. You don't want plants to freeze, of course, or really drop much below about 50 F (10 C), but especially if you don't have as much light as they might want, cool temperatures are the best. At 50 or 60 (10-15 C) the plants don't really grow, but they don't die either. They just sit in suspended animation until spring, which is exactly what I want them to do. For me, this is easy, because I'm cheap and keep my house chilly. When I'm home and awake, I keep my thermostat at 63. At night and while I'm at work, it is at 50. Perfect for everything... except guests. But serious, plants always come before guests! If you like to be warmer, a cool basement or garage might be a better bet. If they are cool enough, many plants will stay dormant and you won't even need lights, or you can rig up some florescent bulbs to keep them happier.
Kept cool and dry, succulents like this agave are effortless. I basically ignore them, and they're fine.

4. Keep them dry. Don't dehydrate them, but be careful not to over water. These plants are going to be stressed and barely growing, and too much water will make them rot. Also, lots of plants are adapted to going dormant through seasonal droughts, and keeping them dry will signal them to shut down and wait -- which is exaclty what we want them to do.

That is my standard protocol, and it works for just about everything I've tried.

Some plants will come through fine with even more extreme treatments without any light at all. Just about anything which forms a bulb or tuber can be dug up, branches chopped off, wrapped in dry newspaper, shoved in a plastic bag, and left somewhere cool and dry like a basement. I do this regularly with tuberous begonias, Salvia guaranitica 'Black and Blue', sweet potato vine, dahlias, callas, cannas, and gladiolus. When I try new plants, I often go out in the fall with a garden fork and pop them out of the ground to see if they have a tuber I can save -- turns out that four-o'clocks (Mirabilis jalapa) and hyacinth bean (Dolichos lablab) both form easily overwintered tubers. I've heard of people doing the same with the thick, fleshy roots of nicotiana (ornamental tobacco) and scarlet runner beans as well. Some plants that don't have obvious bulbs or fleshy roots will take the same treatment, as with the bananas I talked about at the beginning. Similarly, the shrubby Hibiscus rosa-sinensis can be over wintered in the dark, fully dormant. Just put them somewhere cool (like a basement) and let them dry down. They leaves will drop off, and they'll sit patiently until warmth and water returns in the spring. I've heard Pelargonium will do the same, and are probably oodles of other plants that can be overwintered this way as well. The only way to find out is to try. It doesn't take long to pop something out of the ground and throw it in the basement. If it dies, oh well, it would have died anyway had you left it outside. If it lives, well! Then you've got a lovely plant for next year, and a trick to show other gardeners!

To sum it all up: Keep them cool, light, and dry, and experiment with everything. If you have success with something unexpected, be sure to brag, and please let me know, so I can share your methods with other gardeners.